In this guide, we will be having a complete walk through of Trello terms and steps to use Trello effectively in order to improve the efficiency of your work.
Trello is a systematic and organised approach to Project management. It can work as your team collaboration tool or personal To-do list.
It won’t be the fastest process as you begin, but it will help you fasten the process gradually. You will be able to lighten the workflow and save time to be more productive.
That is also because we as a business have been through the phase. And we know the value an effective project management can provide. However, there are only a few such tools that make collaboration easy and effective.
For that matter, thanks to Trello for stepping in and offering its best.
Trello is an incredible project management or collaboration tool that contributes to business’ success and smooth workflow.
It assists you in organising your tasks into boards. You can create a board and assign tasks to each member of your team.
Let’s say you have three projects to manage at a time. Then trello lets you create a board for each project. You can add teammates and assign them tasks accordingly.
Because all your three projects will be in process at the same time, you will be able to manage them well and keep an eye on your team’s working stage.
Trello has a wide range of elements and they immensely contribute to your projects. If you make the utmost use of them, they will assist in better collaboration.
Following are some of the examples.
Create boards
Assign tasks using cards
Allows commenting
You can highlight important tasks
Add due date and calendar view
Once you realise the extent to which a tool can simplify your work, you would love to automate every project and task in your business.
Trello works on certain terms that help organise the workflow of a business. You can say it offers elements that you can use to simplify your to-do list.
A business cannot work effectively without enough tasks. But how do you manage those tasks if they are in large numbers and need good cooperation?
For that matter, Trello helps collaborate effectively with its wide range of elements.
Following are the Trello Terms –
Boards
Cards
Lists
PowerUps
Automation
Let’s dive into the ways of getting started with trello and use it to its full potential.
The collaboration tool provides you a space called boards, where you can organise all your tasks. You can create a board for each project and assign tasks to your teammates.
Each board consists of cards and lists. They are all about the assigned tasks that work in a process like step after step.
For example if you created a board to plan out blogs for a month, you can organise the steps as, ‘assigned the topic’, ‘working on’, ‘revision status’, ‘final draft’, ‘completed’, and ‘published’. Isn’t that quite very productive?
Plus, It is highly recommended if you create a separate board for each project as you can view one board at a time.
Follow the instructions to create a Board in Trello!
Firstly, create a Trello Account (Sign Up for Free)
As you login to your Trello account, you will see a trello home screen like this ↓
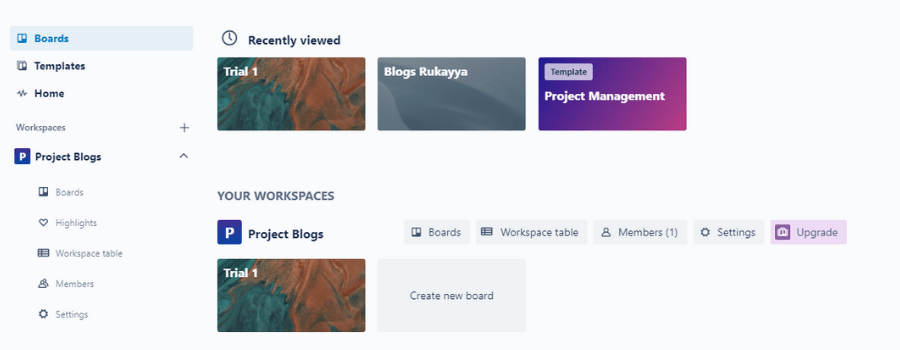
Can you see the section “YOUR WORKSPACES” in the above image?
Yes, right there you will see a rectangle shaped box named as “Create new board”
Something like this ↓
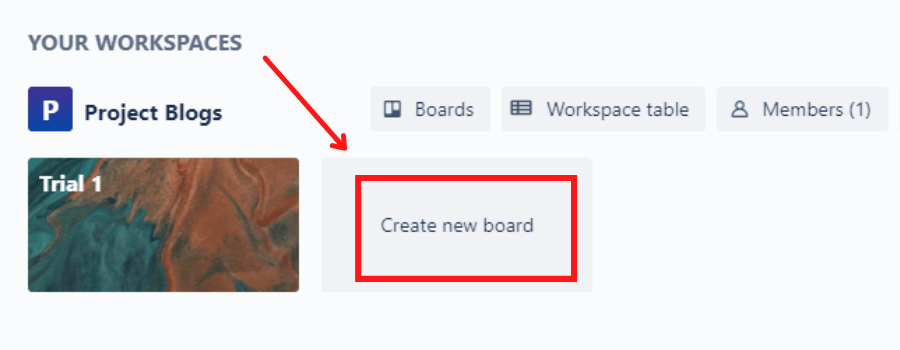
Click on “Create new board”
As you click on “Create new board”, you will see an image like this ↓

Name your board using “Board Title”. Keep it specific and clarify the project.
Now under “Visibility”, click on “Workspace”. You will see options as such ↓
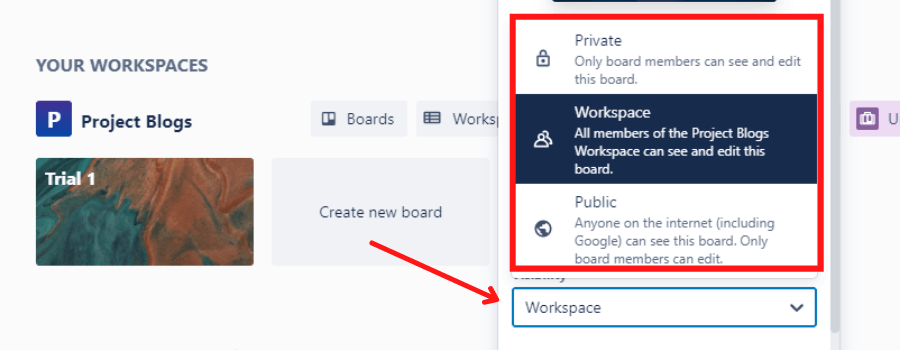
You can select one Option that is convenient for your business and projects.
Now click “Create” and boom!
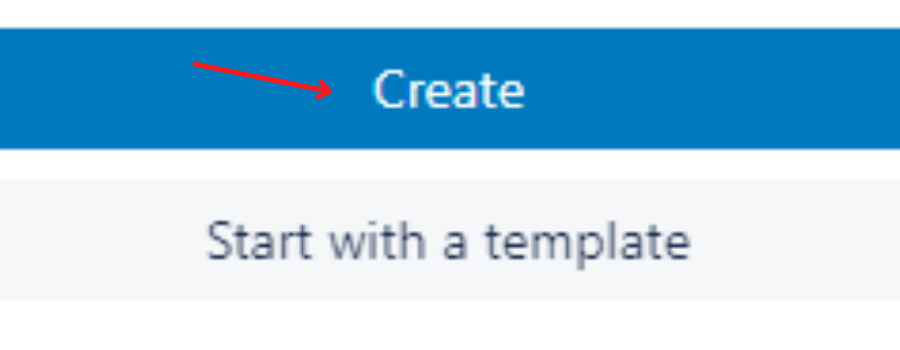
You will be redirected to a dashboard that looks like this ↓

12. Well done! You have successfully created a Board. Now you can start to assign tasks in trello.
When you think of different stages of a process within a board, it is called a list. You can fill up those lists with cards.
For example when a card is being moved, they are moved to a different list. Like moving a card of a particular blog topic to working, in progress, or completed list.
Each card can have tasks assigned to a specific team member. So when they complete one stage of a process, they can move the card to the next list (stage of a process).
Everytime a card is moved to a left or right list, the members added will know the status of the project.
That means, each member including you will stay updated and won’t have to manually communicate regarding each task. You can always comment within cards and describe the task for better communication.
Once you have successfully created a board, now you can get started with your lists.
Let’s see how can you create lists in Trello –
You can see a box that says “Enter List Title”

You can title the list according to your Project like, ‘To-do list’ or ‘Blog Topic’ and hit the button “Add List”.
As you will keep adding lists, you will see your board like this ↓
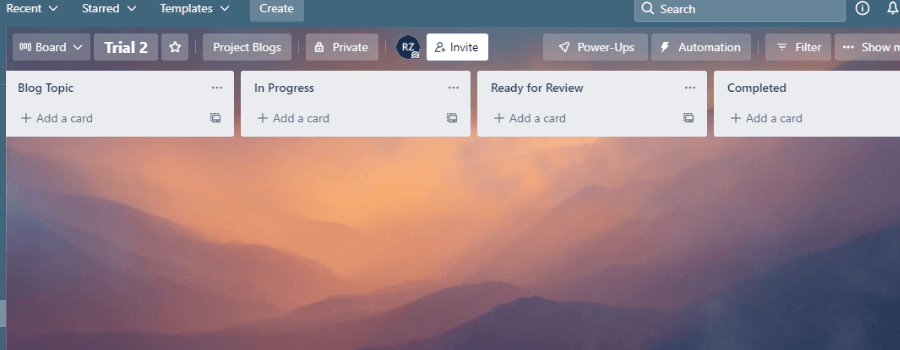
You can also give your lists some actions that will help you run a smooth workflow. I will show you how.
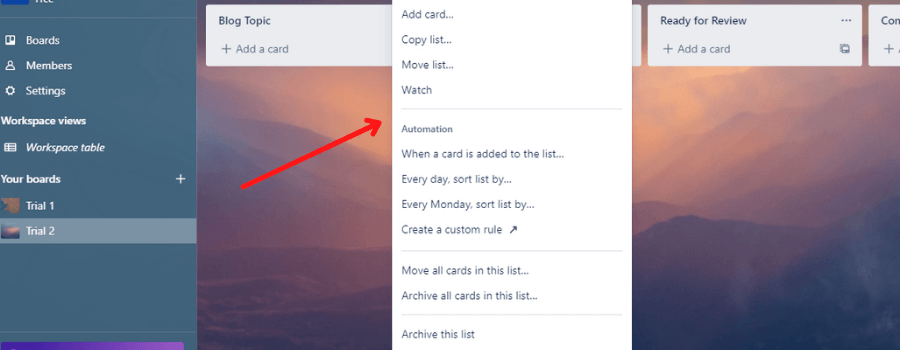
Look at the three dots on the right of each list. Example ↓

When you click on these dots, you will see a few actions like adding a new card, creating automation, moving and archiving cards, just for an effective collaboration among your team.
So what is a trello card?
Basically, Trello let’s you understand the working of each project by adding cards to the list. You can create different cards under a single project. It enables you to control each step of a project without manually communicating with your team.
For example, you created a card that includes the topic of your blog. You can assign the card to a teammate, who will be responsible for completing the task. As they move cards to various lists within a board, you will be able to track the progress of your project.
In other words, you will stay updated with what your team is working on, what work is completed and what work is in progress.
A trello card is an important feature and you must know the steps to create one.
Let me walk you through the steps!
Can you see the “Add a Card” option in the below image?
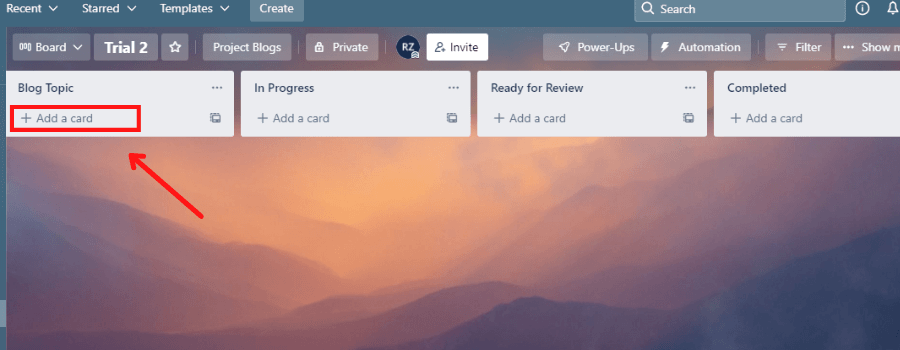
Click on that button and you will see a window like this ↓
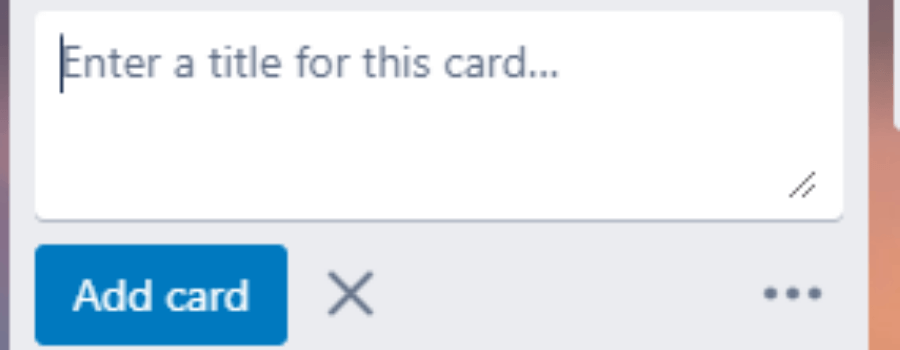
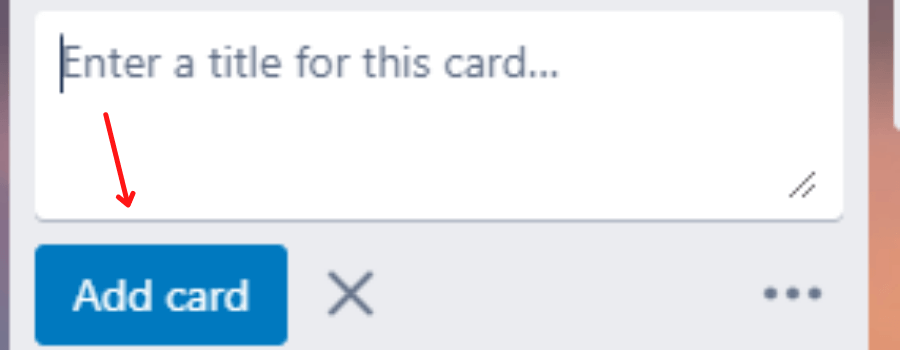
Enter a Title, which will be the task topic for your team. For example – Write a blog on….
After you enter the title, hit the button Add Card.
Similarly, you can create cards once previous card tasks are completed.
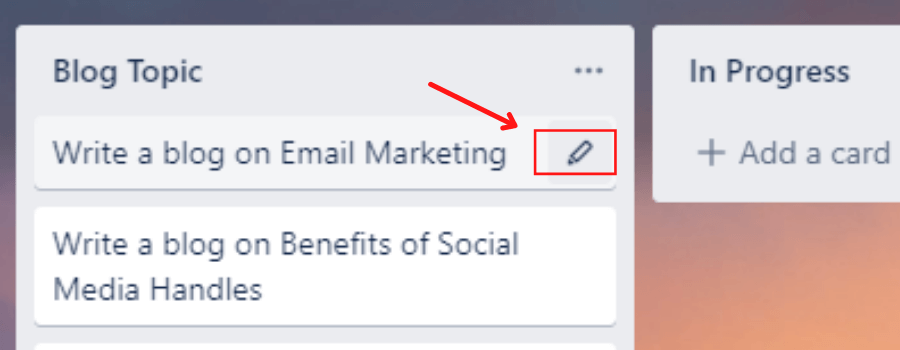
Each card offers actions like assigning tasks, commenting, adding members, labelling, calendar view etc. You can choose an action you would want for your cards.
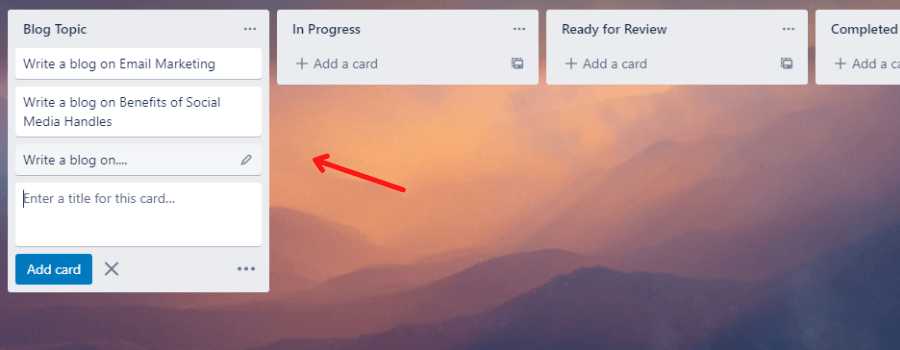
Once you add a card in the list, click here
Now you will see a pop-up with actions like these ↓
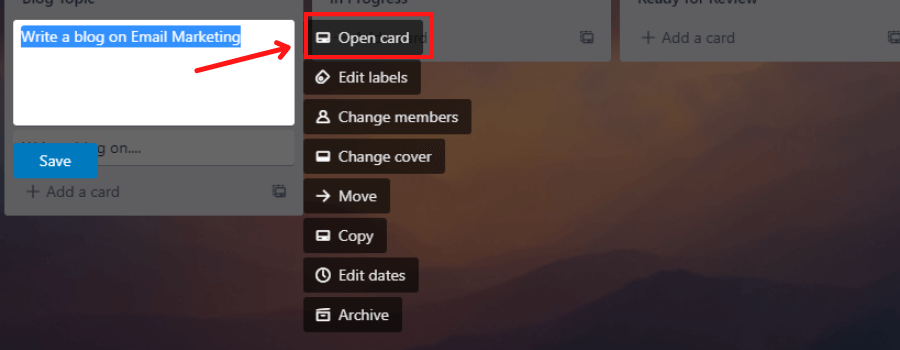
Click on the “Open Card” button as mentioned above.
As you click on the “Open Card” button, you will be redirected to a screen as such ↓

You can click on the tab “Members” to add members with ease.
It will require the email address of your teammate and they must be on Trello to be able to add them.
Similarly, as you can see in the above image, you can add a detailed description of your card Title. Why? So the members assigned to the card can understand the task well and clearly.
If you want to add a new member after the card is being moved to another list, you can add the member during that stage of the process similarly.
Within the “Open Card” section, you will find a tab named “Dates”.
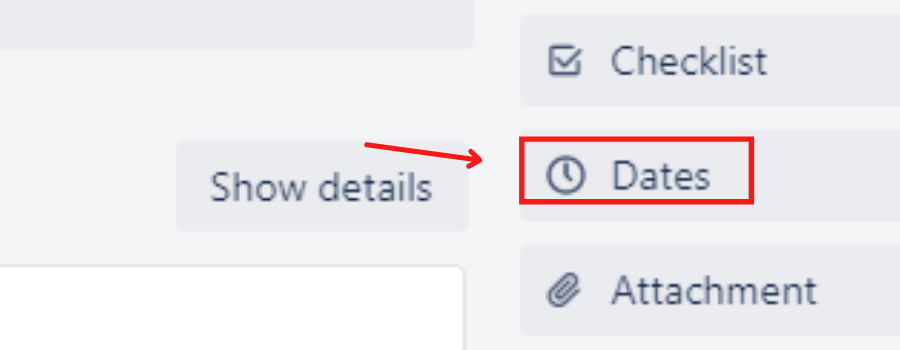
Hit the “Dates” button to see a Calendar View.
The Calendar will allow you to assign a due date.
Once redirected to a Calendar View, add a “Start Date” and “Due Date” Accordingly.
You can see an example below ↓
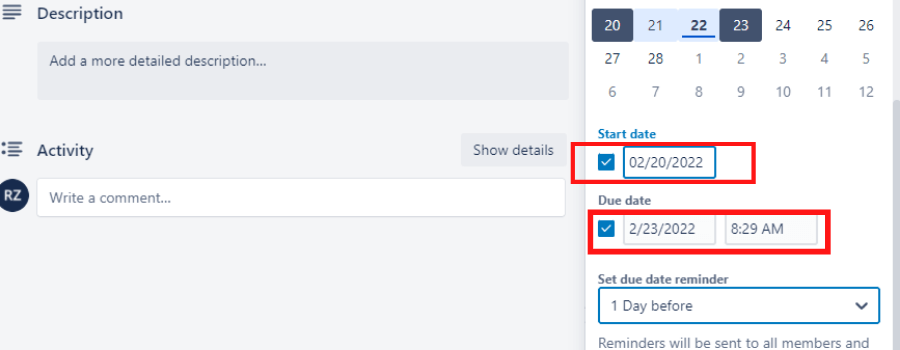
Once selected the “Start Date” and “Due Date”, add a reminder Date.

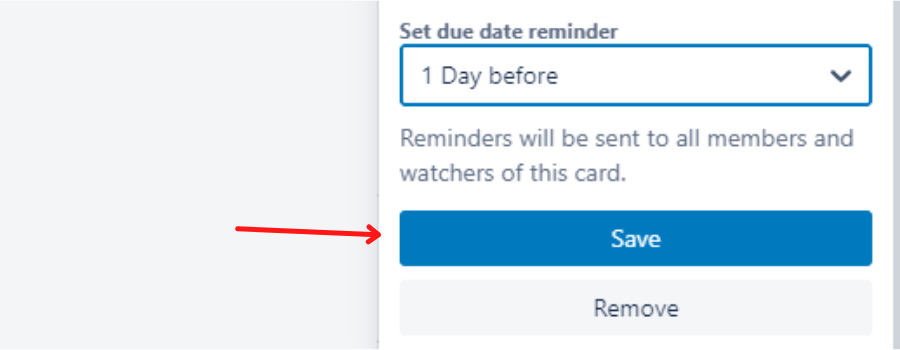
You will see a few options of reminder you can choose to notify the member
Select a duration as convenient to you.
And boom! You are ready to save the process. Just hit the button “Save” below “Set Due Date Reminder”
Cards also provide you with numerous other features. You can add attachments, comment, mention members, add checklists, add labels, use Power-ups and also move cards to various lists within the board.
As you explore the “Open Card” section, you will find them all at one place.
Trello provides so much flexibility to your project that it enables you to use different colour labels to determine urgency, on time completion, and other similar labels.
Here’s how you can add labels to Cards –
Go to “Open Card” section
Find a tab that says “Labels” on the right side below the tab “Members”
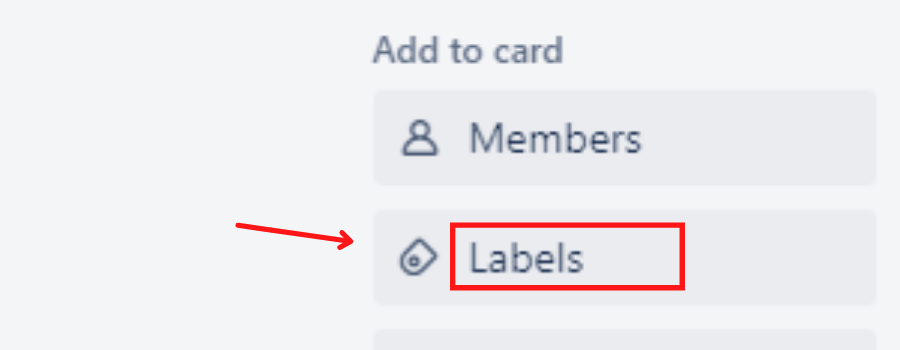
Click on the tab “Labels” to explore the colours.
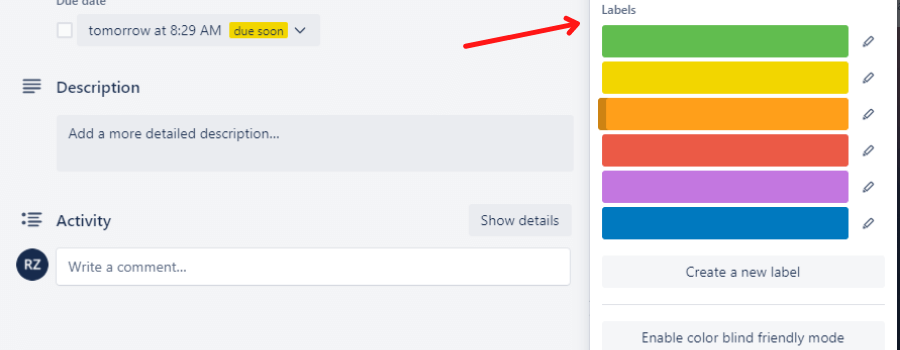
Click on the “Create a new label” button and your label will be added to the card.
If you want, you can also enable colour blind friendly mode for certain teammates. You can find the tab just below the “Create a new label” tab.
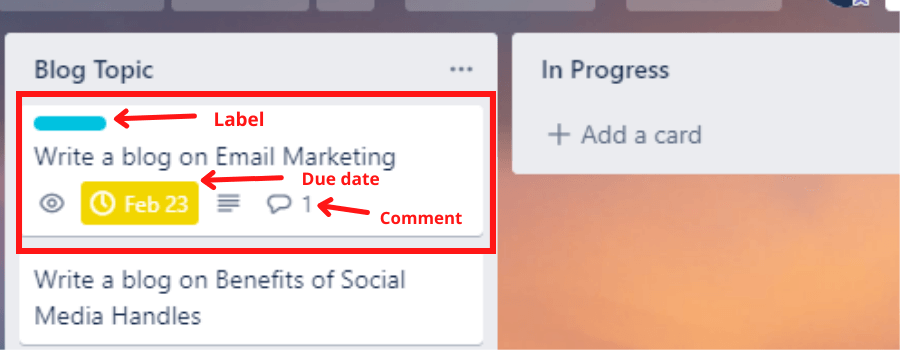
Once all actions are saved on the card, it will be visible to your members like this ↓
We are all well aware of the fact that sometimes we are too busy to even scroll through apps, and for that matter smart work indeed helps.
Trello also lets you search through the app using shortcuts.
Here are the following shortcuts you can use to search in Trello –
|
ShortCuts |
Operation |
|
b |
Search for boards |
|
‘w’ or ‘]’ |
Expand board menu |
|
‘right’ or ‘left’ arrow keys |
Open adjacent cards in a list |
|
‘[‘ |
Open and close the boards navigation sidebar menu |
|
‘/’ |
Search through bar |
|
‘c’ |
Archive a card |
|
‘d’ |
Pick the due date picker for a card |
|
‘-’ |
Add a checklist |
|
Control+V |
Paste links in cards |
|
‘e’ |
Edit cards |
|
‘esc’ |
Exit editing mode |
|
Control+enter |
Save any writing – editing comments, editing card title, description, etc. |
|
‘f’ |
Open card filter menu |
|
‘l’ |
Open the Label pop-up |
|
‘;’ |
Show or hide names on the label |
|
‘m |
Open add/remove members menu |
|
‘n’ |
Add a new card in an empty list or after a selected card |
|
‘,’ or ‘.’ |
Move card to the bottom of the adjacent left or right list |
|
‘<’ and ‘>’ |
Move card to the top of the adjacent left or right list |
|
‘q’ |
Check the cards assigned to you |
|
‘s’ |
Watch and unwatch a card |
|
space |
Assigning or unassigning oneself from card |
|
‘t’ |
Edit the title within the card |
|
‘x’ |
Remove all filters from active cards |
|
‘? |
Open shortcut page |
|
@ |
autocomplete member’s name while commenting |
|
Control + ‘C’ or ‘V’ |
Copy and paste card |
|
‘Z’ |
undo the action performed last card |
|
‘r’ |
repeat the action performed on previous card in current card |
With an incredible tool, comes incredible power ups.
Trello offers add ons within each board. These add ons are special features you can utilise to manage projects effectively, and give your team members an opportunity to work in a well organised workflow.
There are amazing power ups that can be used for your projects like you can add a calendar view that shows the due date in cards or you can add a team chat box that lets you communicate with the entire team in one place.
In fact, you can also add a back-up powerup to have your data backup in Trello for safe side.
Other than assigning due dates to cards, you can also view the Calendar with all dues at one place.
Now a Calendar view is an add on feature (Power-up). With a free Trello account you can add any one power up. And in that case, a Calendar can be a useful feature.
But how to add a Calendar View or other Power-ups?
Don’t worry, I will guide you through the steps.
Sign in to your trello account
Head to a board
Once you land up in your board, you will see a Power-up tab on the right side as shown below ↓

Click on the ‘Power-ups’ button to add one, and follow the instructions shown here ↓
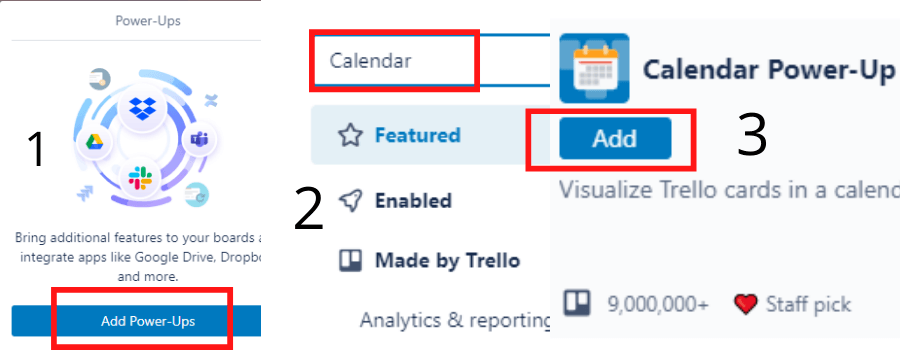
Once you click on the add button under the Power-up, you are ready to use the feature.
Now you can successfully view the calendar with all due dates in one place.
Isn’t that amazing already? You would be able to make the most out of your Trello account even with a free Signup until you need premium features and more than 10 boards.
Since the aim is to simplify your workflow and work efficiently, Trello allows users to automate the process. It offers the flexibility to set your own rules, buttons and email reports.
It allows you to integrate applications that will contribute to better collaboration of your projects.
Trello has a few supporting apps that work well with the project management tool. You can integrate them with Trello and automate the workflow.
For instance, if you want to communicate with your team without browsing through the Trello board, you can connect Trello with Slack and collaborate effectively.
You can also alert your members via email every time they are being assigned a task in the Trello board. Similarly, every time they move, comment, label or complete the task, you can be notified via email.
Some of the Native Integrations are as follow –
Jira
Google Sheets
Slack
Gmail
Doesn’t that sound too organised already? Exactly! That’s how easy the workflow gets with Trello – Project Management Tool.
How to Set Automation in Trello?
Follow the instructions to set your own rules, button and email reports to automate the workflow.
Sign in to your Trello account
Head to a board you are currently working on.
On the top right, below the search bar, you will see a tab ‘Automation’.
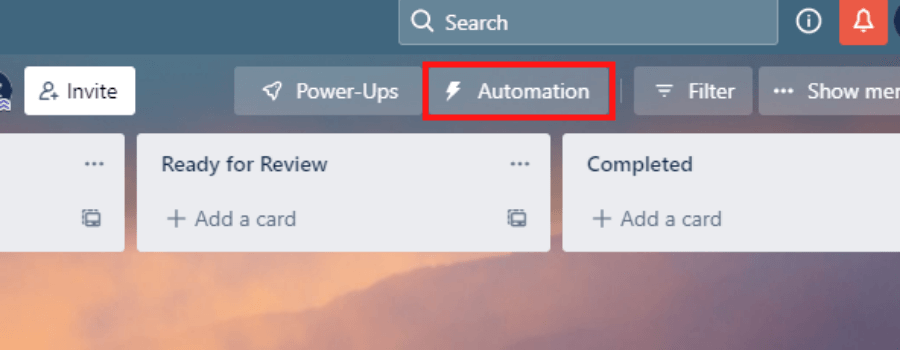
Click on the tab to see a few options like these
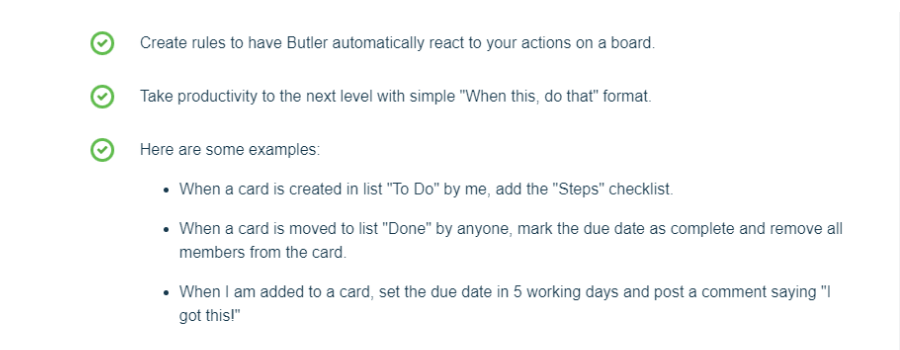
Click on the Rules to create automations that will automatically react to actions, due dates, schedules, etc.
Here are some examples
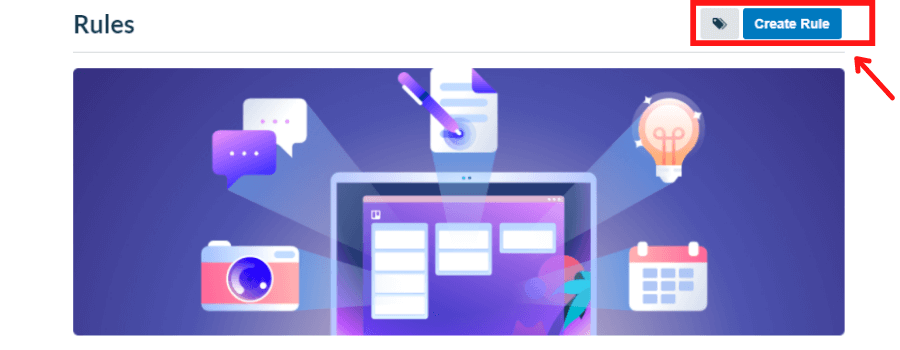
You can use the button shown in the below image to start creating your own rules.
Similarly, go to the ‘Buttons’ tab to create a custom button at the back of each card or on the top of the board.
Here are some of the examples

Click on the create button tab to start creating.
You will be redirected to another page where you can set buttons. It will look something like this
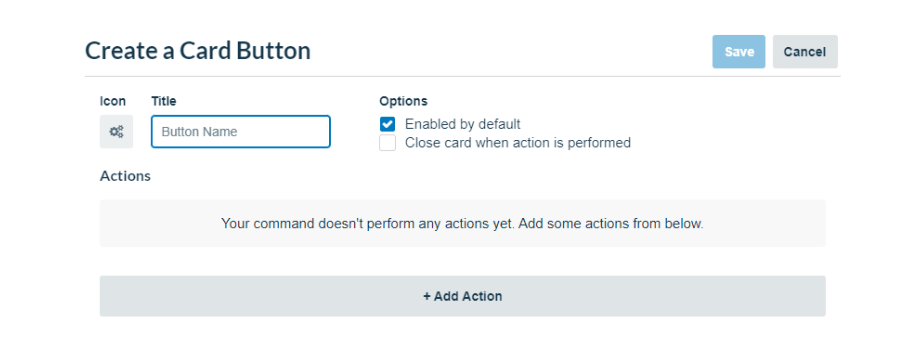
Click on the ‘Add Action’ button to see all actions that can help you automate your workflow.
Once you create your own button, just save the automation and you are ready to go!
For setting up automatic email reports, go to the ‘Email reports’ tab.
You will see a pop-up like this
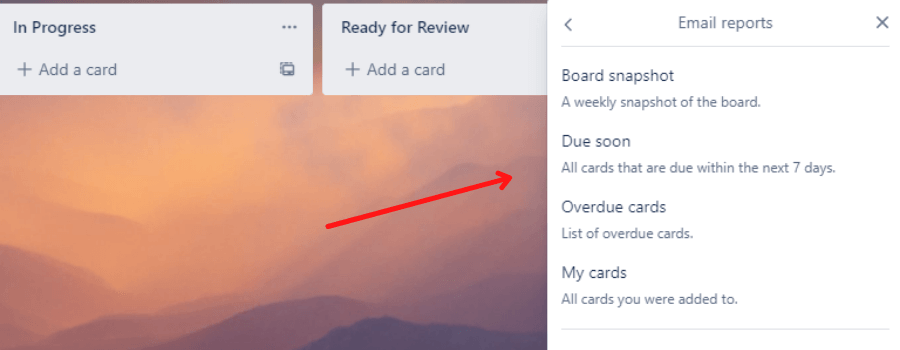
This will help you determine what all kinds of reports you can send your teammates automatically. Just click on the options shown to start scheduling reports.
Here’s an example with an email preview
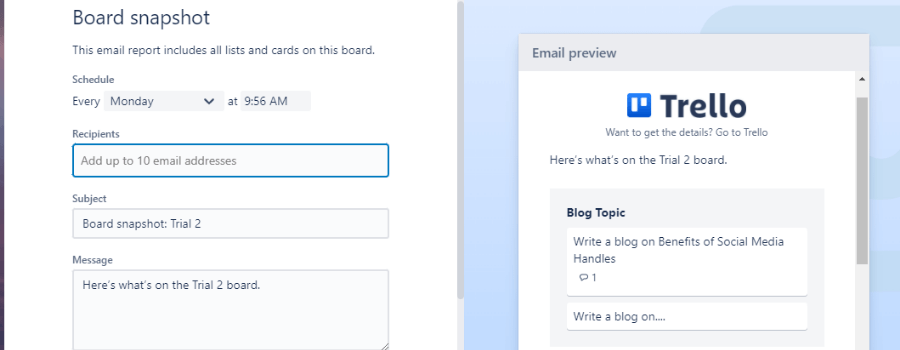
Similarly, you can set email reports for alerting members of dues, a new assignment/task, etc.
8 Million+ Ready Automations
For 750+ Apps
Even as Trello offers native some integrations to work with, what about any other applications that you wish to integrate with Trello? Do you go looking for a developer to help you? Absolutely not!
Instead, what you need is a tool that will help you integrate Trello with other applications, even if you have no technical skills – an automation tool! This tool will help you connect Trello with other apps and sync data between them.
There are quite a few automation tools available in the market, but if you are looking for the best and affordable, Integrately is it for you.
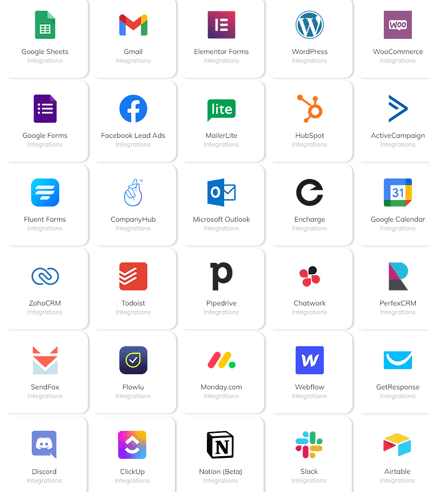
Integrately is a platform that offers ready to use Automations so a business can manage projects with ease. With 8 Million+ ready automations for 700+ apps, Integrately has made an initiative to support businesses in improving their efficiency and productivity.
In fact, it has an integration page dedicated especially to Trello. You can select the applications you want to integrate with Trello and set rules accordingly.
For instance, if you want to sync Trello and Google Sheets, you can select the rules you would like to set for triggers. Like every time a card is added in Trello, a new row will be created in Google Sheets.
Sometimes we do miss on tasks and actions being performed on the board. That is why Trello lets you set desktop and email notifications. That means every time an action is performed on the board or card, you will be notified.
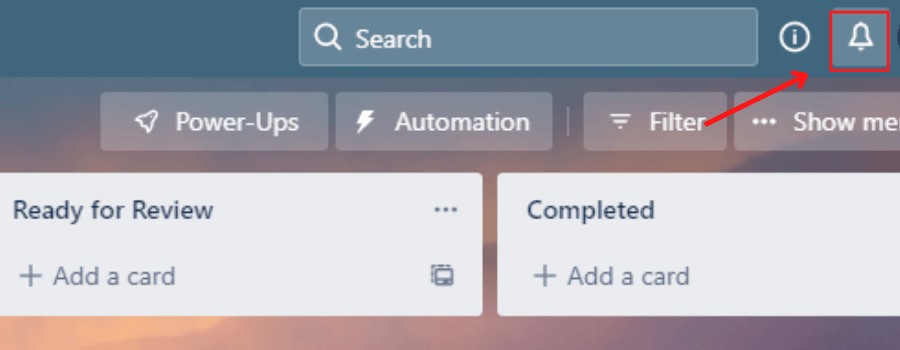
You can also go to the ‘Bell icon’ on the top right corner of your board to check the history of actions performed. It will always keep you updated.
Additionally, you can change the email notification frequency using the below steps.
Click on the bell icon
Scroll down to see a button ‘Change notifications email frequency’
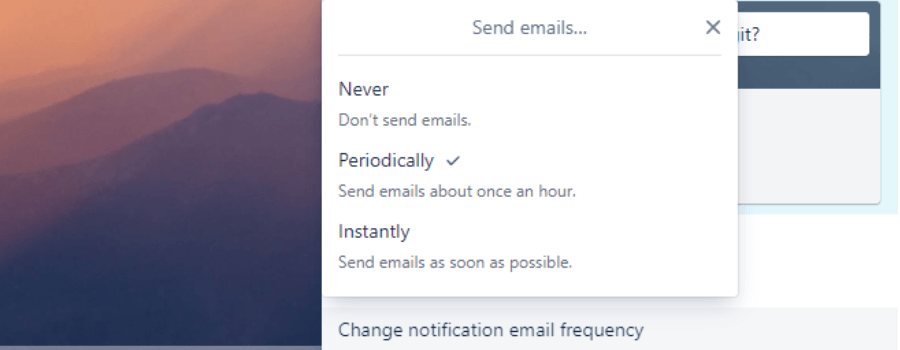
Click on the button and it will give you a few options.
Now select the most convenient option to receive email notifications for actions performed on the board. Here’s an example
Since you are into business and it requires an effective project management system, you may do certain things wrong while using Trello.
That can somewhere affect your business and its growth. I mean it can take-up more of your time and offer a little less efficiency in coordination. Which is why it is critical to avoid those mistakes to achieve the utmost growth in your business.
If you understand, follow and implement, you can use Trello efficiently.
As a project management tool, Trello offers the maximum features to make it easier for you. But, are you utilising them all?
Labels are one way to communicate with your teammates. You can literally name the colours and add them in cards. You can also use the single colour for multiple labels, but at least make a use of them.
Like you can use colours to determine level of urgency in your project or you can use a colour to determine pause and resume of tasks.
It will help you and your members coordinate effectively and won’t require much manual communication. That will save so much of your time and the work will always be in action.
Although Trello is an easy to use tool, it requires a lot of attention.
If you organise a board, assign a new member to cards, and due to lack of training they mess up, wouldn’t that need more of your time that could have been saved through a teaching-learning process?
So ensure you invest some time to charge-up your teammates about a new tool you are going to use in business.
Back-up is like a Plan B. You never know when things go wrong. It is technology after all. Even if Trello is the best app for your business, something somewhere could go wrong.
That is why you need a Back-up plan. No back-up could result in a huge mess and loss of data.
So how do you have a back-up of your Trello account?
Simply go to “Power-ups”,
Click “Add Power-ups”,
Search for “Back-up”,
and add the “Back-ups for Trello” Power-up
Boom! You are ready to back-up your data
Lists are a great way to organise your Trello boards. It simplifies tasks and workflows.
However, you may create some extra lists with member names other than lists with stages of a process.
Those lists could be to determine individual tasks after moving a card to those lists. But it can create a mess on the board. It is better if you assign the members in cards itself.
You can also automate the process like notifying when a card is moved to a list. So the list that is supposed to be worked on by a specific member, they will receive the notification.
Otherwise, you can use ‘@’ to mention the member after moving the card to the list.
Due dates are a way to say you have an organised and controlled workflow. With great flexibility in work comes a good control as well, and Trello offers this feature cost free.
However, many don’t consider using this feature. The possibility is your teammates can forget completing important tasks. They can also take advantage of ‘No due dates’ and offer leniency.
That is why I would recommend you make use of this feature. Trello anyway provides it under a free account so why not benefit from it?
Most people are unaware that, unless you add a member to a card, they will not receive a notification even if they are tagged in comments within cards.This will eventually result in lack of coordination and delay in the entire process.
Trello is a tool that ensures a better workflow and management system. If you use it in limits, it will offer less efficiency. So make sure you add members you want for your projects. Only then they will receive a notification to join the board and will be notified of all tasks assigned to them.
Isn’t it amazing that you can fully benefit from an effective project management tool?
Because who thought the technology would come so far that it would simplify our workflow.
No doubt, you can always take advantage of these useful features of Trello for absolutely Free –
Create different Boards for Different Projects
Keep a watch on your team
Add up special features using Power-ups
Label your cards to promote priority
Have lists of the process
Tag members under comment sections
Give them due dates
Use shortcuts, etc.
You can find the archived cards in Trello by following the below steps -
Go to the “Show Menu” tab at the top right corner of your board.
After clicking, scroll down to see a tab named “More”.
Under “More” click on the first option “Archived items”
Now you can click “Send to board” or “Delete” accordingly.

